
Post-Construction Cleanup: A Step-by-Step Guide
A new renovation or construction project often brings excitement and a fresh start. However, once the last nail is hammered in and the final fixtures are installed, the job isn't finished yet. The construction dust, debris, and leftover materials need to be cleaned up to complete the transformation and make your space usable and enjoyable. This process, known as post-construction cleanup, involves several steps and requires meticulous attention. Here's a guide on how to clean up after construction work.
1. Initial Assessment
Start by walking through the project area and making a list of what needs to be done. Note any large pieces of debris that need to be removed, any dust or dirt that needs to be cleaned, and any areas that need special attention, such as paint splatters on the windows or grout residue on the tiles.
2. Gathering Cleaning Supplies
Based on your initial assessment, gather the supplies you'll need for the cleanup. Typically, these include heavy-duty trash bags, a broom, a dustpan, a vacuum cleaner with a HEPA filter, microfiber cloths, a mop, bucket, all-purpose cleaner, window cleaner, and gloves for personal protection.
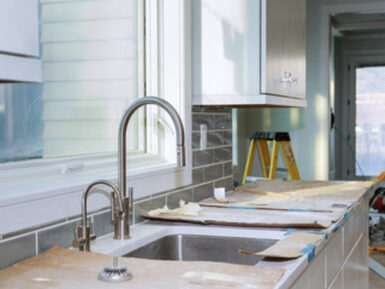
3. Debris Removal
Before you start the actual cleaning process, it's important to remove all large debris, leftover materials, and trash. Construction projects can leave behind wood scraps, drywall pieces, and other waste that needs to be properly disposed of.
Ensure that you sort out recyclable materials such as metal and wood from other waste for eco-friendly disposal. Renting a dumpster might be necessary for larger renovation projects.
4. Dusting and Vacuuming
After all the debris is removed, dusting and vacuuming come next. Construction dust can settle everywhere, including walls, window sills, shelves, and hidden nooks and crannies. Use a microfiber cloth to dust surfaces, starting from the top and working your way down to prevent dust from settling on cleaned areas.
Vacuum all surfaces next, including carpeting and upholstery. Ensure your vacuum cleaner is equipped with a HEPA filter to capture the smallest dust particles.
5. Detailed Cleaning
This is the step where the space starts to shine. Use your all-purpose cleaner and microfiber cloth to wipe down all surfaces. Special attention should be given to the kitchen and bathroom areas, including appliances, cabinets, counters, sinks, and fixtures.
For window cleaning, it's best to use a window cleaner and squeegee to leave them streak-free. Don't forget to clean the window sills and tracks.
Floors should be swept thoroughly and then mopped. The type of floor (hardwood, tile, carpet, etc.) will determine the kind of cleaning products you use.
6. Final Inspection
Once all the cleaning is done, take the time to do another walkthrough. Open all drawers and cabinets, look under furniture, and check corners for any missed spots.
7. Professional Help
Depending on the size of the construction project, it may be worth hiring a professional post-construction cleaning service. They have the experience, equipment, and know-how to get the job done efficiently and thoroughly.
In conclusion, post-construction cleanup is a vital part of any construction or renovation project. Although it might seem daunting, breaking the task down into manageable steps can make the job less overwhelming and more effective. So, roll up your sleeves, put on your cleaning gloves, and get your space shining and ready to enjoy!